


I’m usually up for a good DIY project. Nothing too intense though—no saws and no, you will not see me busting down drywall. But I do enjoy trying out new creative outlets. I’ve made pottery, painted furniture, and have had so much fun crafting on my Cricut machine. Mostly I DIY for fun and sometimes just to test my skills, but recently, I took to my own talents simply out of frugality.
DIY out of Frugality
When my nine year old daughter asked me for furry desk chair, I was like sure, cool. But after combing the internet, I was highly discouraged. Am I alone in my thinking that paying over $200 for a desk chair with white fur for a child is absurd?! I can already see the pencil and the marker spots all over it…and how do you even wash a fur chair? You don’t! Even on discount sites, I was still seeing chairs cost upwards of $100. And I just couldn’t do it. But rather than scrap the idea all together, I wondered how hard would it be to reupholster an old computer chair…
The DIY Fur Chair
What I found was that it wasn’t hard at all! In fact, it may be one of the cheapest, easiest, and most well-received DIY projects I’ve done in a long time!
What you’ll need:
- Computer Desk Chair (can be old, fabric condition does not matter)
- 2 Yards of Furry Fabric
- Scissors
- Hot Glue Gun
- Staple Gun and Staples
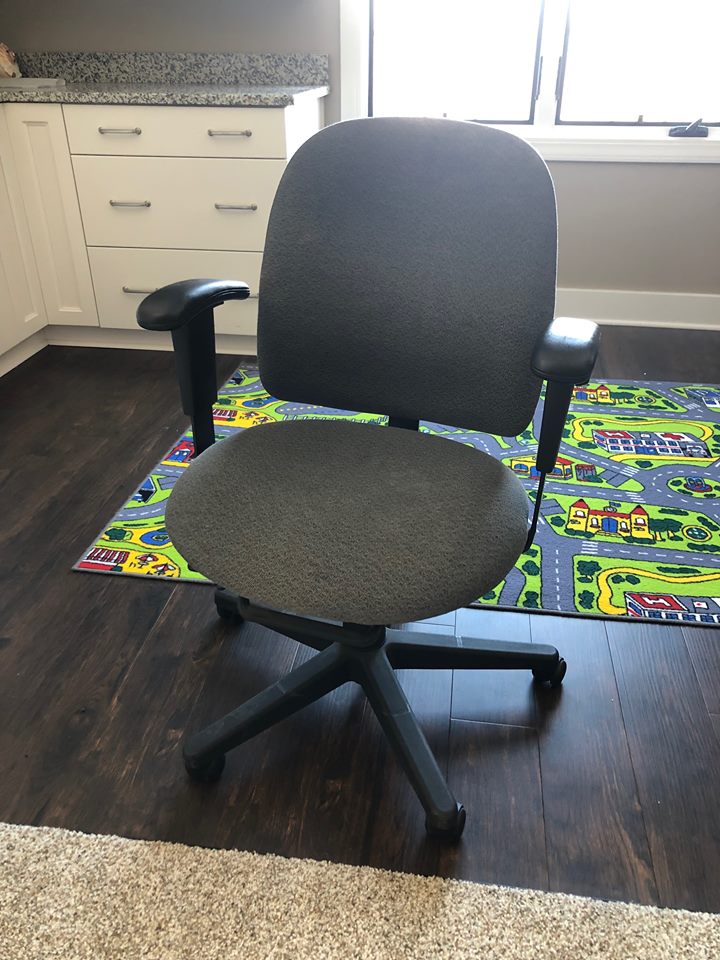
- I started with an old office chair I wasn’t currently using. I figured, since I was winging this project, I really wasn’t out much if it turned out to be a disaster.
- Then I went to the craft store and picked out a nice pink furry fabric that I knew my daughter would love. I spent around $20 for 2 yards, after I used my coupon.
- I roughly wrapped the chair with the fabric—just to make sure I could cover it. I trimmed the excess fabric and laid it out on the chair to see how I wanted it to look.
- My chair has a separate seat and back, so I started with the seat. I used hot glue to glue it down. Once the majority of the chair’s seat had fabric glued to it, I took my staple gun and went around and stapled down the pieces around the corners and edges of the fabric. Then I did the same on the back of the chair, as well as both arms.

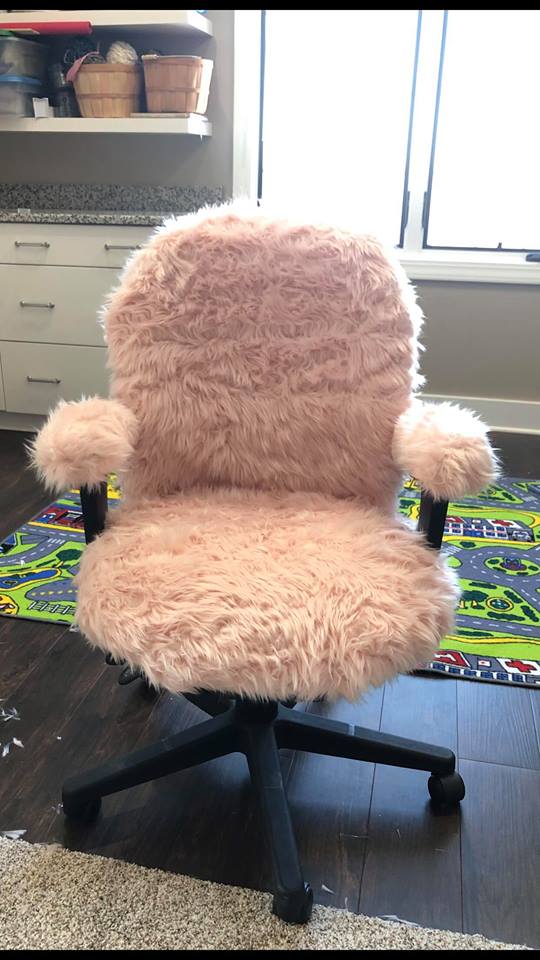
From start to finish, this project only took me around 20-30 minutes, which was a lot less than I had anticipated! I was amazed how forgiving this furry fabric was to work with! Seams blended and staples hid well…I couldn’t have asked for a better type of material to work with for this project! The true test was my daughter’s face when she saw it. She fell in love instantly making this $20 DIY chair totally worth it!
If you’ve done a similar project, please share pics below! I’d love to see!


